制作一个洪水泛滥的城市场景


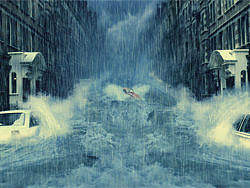
在这个教程里,我们将学到怎样把一个普通的照片制作成洪水泛滥的场景。我们会用到一些相关的技术将这张图片打造成半写实的风格。
转载请注明出处及作者!
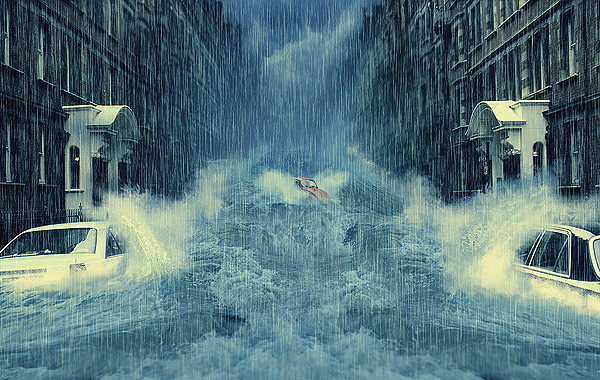
In this tutorial, we will learn how to manipulate a simple photo into a flooding torrent of a scene. We’ll use some relatively simple techniques to give
this image a semi-realistic, stylized feel. Let’s get started!
在这个教程里,我们将学到怎样把一个普通的照片制作成洪水泛滥的场景。我们会用到一些相关的技术将这张图片打造成半写实的风格。我们开始吧!
--------------------------------------------------------------------------------
Step 1
With the main image opened, use the Clone Stamp tool to remove any unwanted entities, like the elderly couple walking. Try and clone areas around the couple
so it doesn’t look odd and mix your usage of soft, and heavy round brushes to define those edges.
打开主场景,用仿制图章工具移除所有不想要的物体,比如这对老夫妻。试着克隆这对老夫妻周围的区域,用大的圆形软笔刷处理边界,这样能让图像看起来
更自然。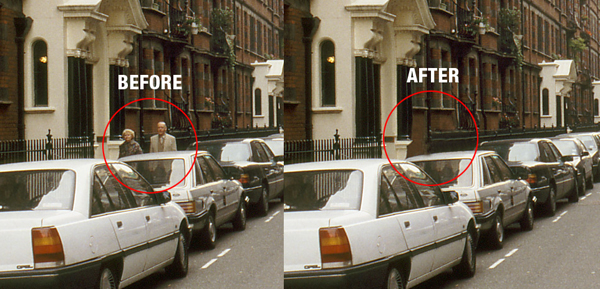
--------------------------------------------------------------------------------
Step 2
Next you will want to cut around the edges of the roof tops so we can add in our stormy sky. Use the Polygon Lasso Tool for this. Don’t worry about
accuracy, as we’ll be blending everything later, just make sure that the sky is cut out. Once selected, unlock the “background.” Now double-click the
layer, then rename it to “backdrop” and hit Enter. Delete the sky.
下面你需要沿屋顶的边缘创建选区,这样我们能加进暴风雨般的天空了。用多边形套索工具做这个工作。别担心不够精细,我们之后会将所有东西融合在一起
,只要确保切掉天空就行了。创建选区后,解锁背景层,双击它重命名为“backdrop”,然后Delete删除天空。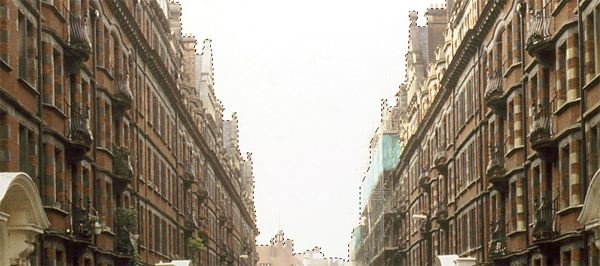
--------------------------------------------------------------------------------
Step 3
Open the Stormy Sky image and place it underneath your “backdrop” layer. Then press Command + T to Free Transform, hold Command while you drag the bottom
corners inwards to add some perspective to the sky, don’t forget to resize if necessary. Apply the transformation when you are happy.
打开暴风雨的天空,把它放到“backdrop”层之上。按Ctrl+T自由变换,按住Ctrl键向内拖拽底角以创建一些透视感,如果需要的话别忘了修改一下大小。搞
定之后按回车就行了。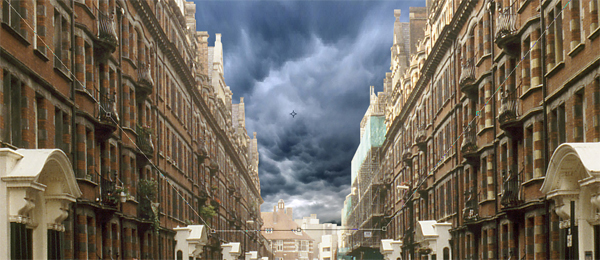
--------------------------------------------------------------------------------
Step 4
It doesn’t look very nice does it? That’s because we’re not done yet. Open and place the
wave image in the center of the image. Now use the eraser, and a soft brush
on it. Get in close and erase the bits you don’t want. Don’t worry if your messy, as the tidying comes later.
Then go to Image > Adjustments > Brightness/Contrast and use the settings shown below.
现在图像看起来不是特别好对吗?那是因为我们还没做完呢(这不是废话吗...)。导入海浪图片(链接见英文),摆在中心位置。用一个然笔刷的橡皮,仔细
的移除你不需要的部分。现在看上去可能乱七八糟的,没关系,稍后我们会再做调整。
执行图像>调整>亮度/对比度,按如下设置调整。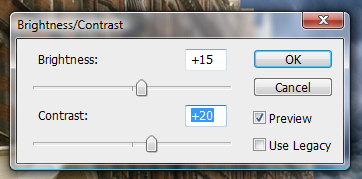
Then go to Image > Adjustments > Hue/Saturation and use these settings.
然后执行图像>调整>色相/饱和度,设置如下。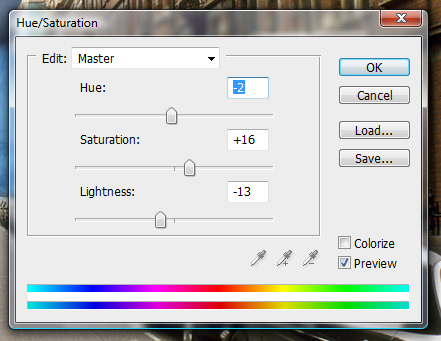
Rename the layer to “Wave”, and your image should now look like the one shown below.
将图层命名为“Wave”,你的图像现在应该差不多是这样。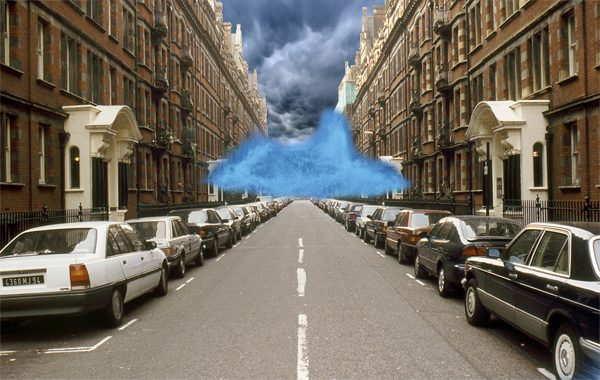
--------------------------------------------------------------------------------
Step 5
Now comes the complicated bit. What you’ll need to do is add all the water files to you’re image and one by one, free transform them to flow with the
perspective of the water then erase the hard edges.
You might also need to duplicate some files in order to fill up areas. Always remember to play about with the textures using the distortion method in free
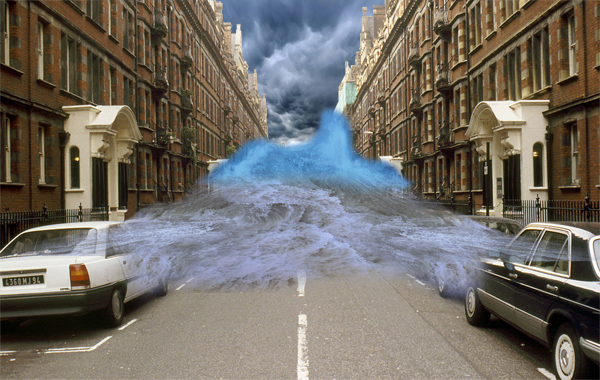
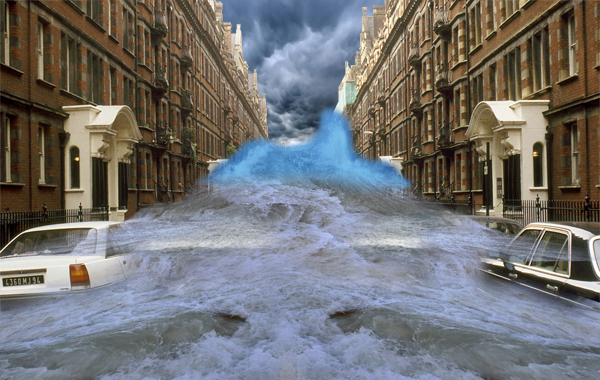
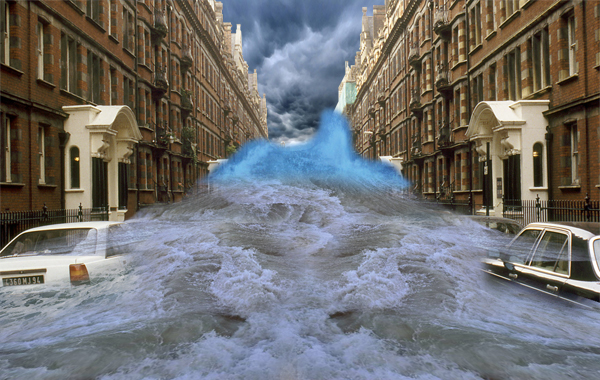
transform and a soft eraser. The more you do, the better it will look. You can see the phases of building up the flooding water in this image.
现在该更进一步了。现在你需要做的是为你的图像再添加一些海浪,调整大小与透视,再用橡皮移除硬边。
你可能还需要复制一些海浪去填充某些区域。记住要不断地用自由变换和橡皮为图片制作一些扭曲变形,你做的越细,效果就越好。你可以从下面的图片中看到现阶段的成果。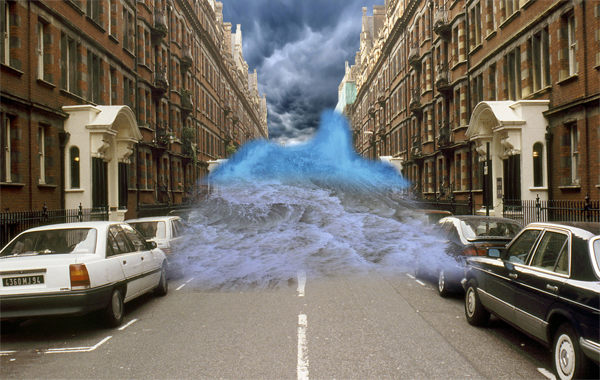
--------------------------------------------------------------------------------
Step 6
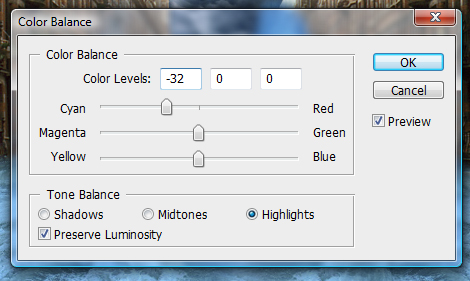
Now we have our water sorted, merge all the “water” layers into one single layer and go to Image > Adjustments > Color Balance and use the following
settings.
Your water should now be nice and blue and match the “wave” layer from earlier. Now merge the “wave” layer with the “water” one.
现在我们已经做好海浪了,将后加的所有海浪图层合并为一层,执行图像>调整>色彩平衡,参数如下。
现在你的海浪看起来应该不错了,能很好的和之前的图像融合在一起。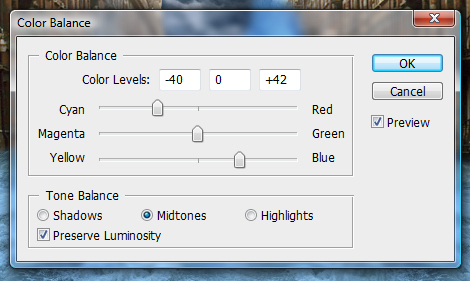
--------------------------------------------------------------------------------
Step 7
Remember the tidy up I mentioned a while back? Well its time now. Turn off the “water” layer so you are left with just the backdrop and the sky.
With the Burn Tool selected at highlights and at 50% exposure, and a soft brush set, start burning the rooftops and the sky around the rooftops so they
appear darker.
记得我之前提到我们还要做些调整吗?现在是时候了。关掉“water”图层,现在只剩下天空和“backdrop”层。
用加深工具,范围选择高光,曝光度50%,软笔刷,开始加深屋顶和屋顶附近的天空,让他们看起来更暗一些。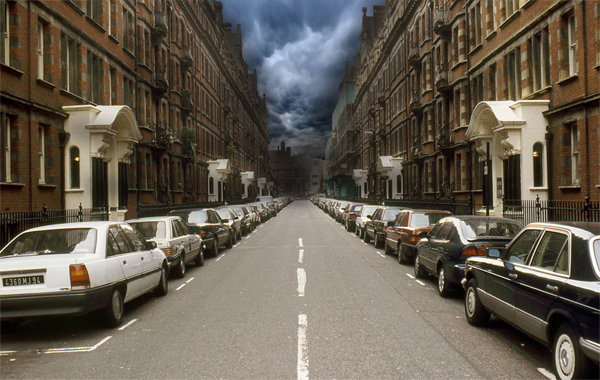
Open the derelict1 image and place it at the right side of the street in the
distance. Use a soft eraser to remove those sharp edges. Merge it with the “backdrop” layer.
打开derelict1图像(链接见英文),把它放到街道的右边远一点的位置,用橡皮擦除硬边,将它与“backdrop”层合并。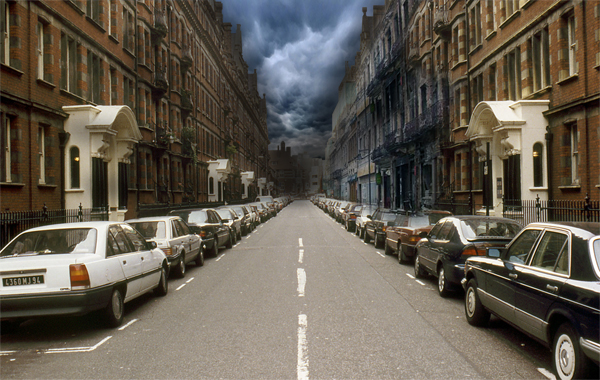
--------------------------------------------------------------------------------
Step 8
Let’s tidy up some more. Turn on the “water” layer sand and start tidying around the edges using a soft eraser. Then select the Smudge Tool and a 20px
charcoal brush using the settings below.
让我们再做一些调整。打开“water”层的显示,开始用然笔刷的橡皮清理海浪的部分边缘。选择涂抹工具,20像素的木炭笔刷,参数作如下调整。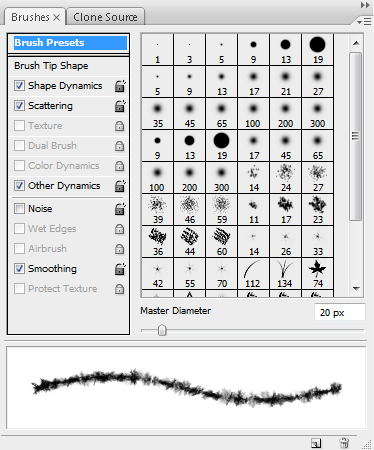
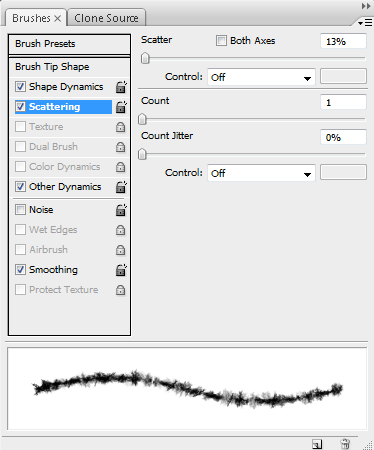
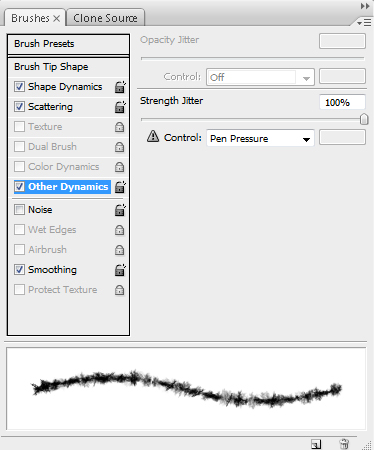
Start smudging the edges of the “water” layer creating very small splashes and more defined edges to realistically create the effect of water hitting a
surface. This might require patience and a steady hand, but time will pay off. It might also be wise to duplicate the layer before smudging as you don’t
want to use all your undo’s.
现在开始涂抹海浪图层的边缘制造一些小的水花撞击建筑后溅起的效果,这会让图片看起来更真实。这项工作可能需要耐心和一双稳健的手,但付出是值得的
。聪明的人会将原始图层复制一层,以免到时撤销键不够用。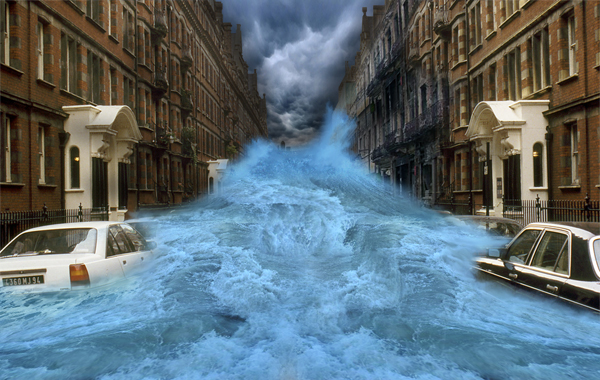
--------------------------------------------------------------------------------
Step 9
Next, select the backdrop layer and go to Image > Adjustments > Color Balance and use these settings.
下面选择backdrop图层执行图像>调整>色彩平衡,参数如下。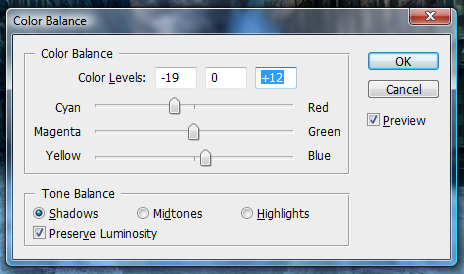
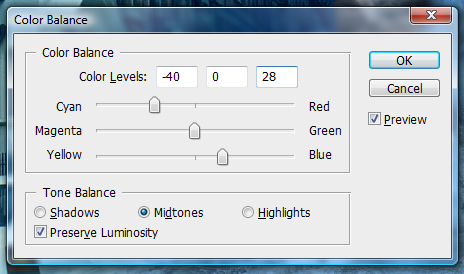
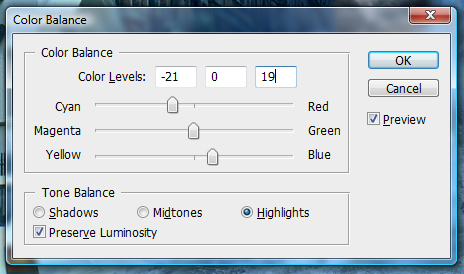
And your piece should now be coming together. Its still a little off, but there is a lot more to do, so lets move on!
现在图像应该很好的融合在一起了。可能还有一些差强人意,但我们还有很大的上升空间,继续前进吧!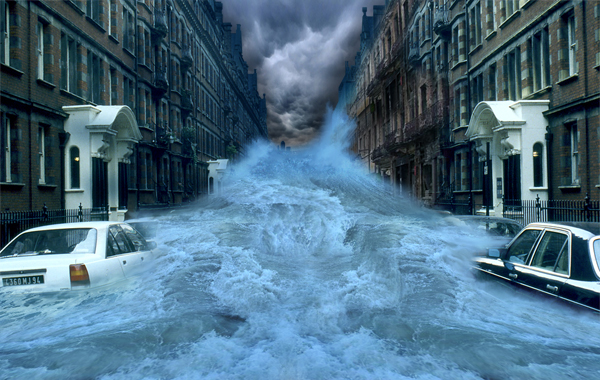
--------------------------------------------------------------------------------
Step 10
Time for the splashes. Now this is the hardest step of the tutorial, and requires a lot of patience, but persevere and you will find that patience is in fact
a virtue (I know, silly right?).
Open up the splash images and carefully cut out the splashes themselves
one by one. Place them onto the canvas. Now use the Warp Transformation (Edit > Transform > Warp) to get the arches you need to create effective splashes,
and erase any unwanted areas.
到了细调水花的时候了。这是整个教程中最难的一步,需要很多耐心,但请坚持下去,你会发现耐心绝对是个好东西(好吧我知道,这句话听上去有点傻...
)。
打开水花的图片(链接见英文),仔细的将水花的部分切下来摆到主画面中。现在应用变形变换工具(编辑 > 变换 > 变形),调整适当的点创建漂亮的水花,并擦除其他不需要的
部分。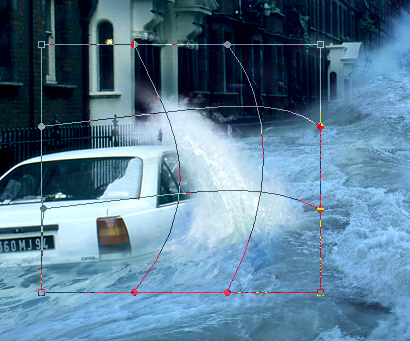
You’ll need to do this for the two cars and for where the water hits the wall down the buildings of the street.
You might also benefit from smudging the edges of the splashes to give them more movement, as well as adding some white brushing to a new layer and smudging
it. Now merge all your “splash” layers.
你需要在那两辆车以及其他被海浪撞击的建筑附近添加水花。
你可能还需要用之前的涂抹技术在水花的边缘制作一些更生动的效果,新建一个图层用笔刷画一些白色再涂抹一下也是个不错的主意。完事之后将所有水花合并为一层。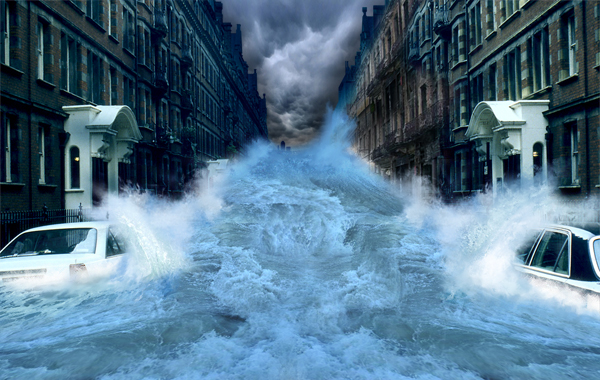
--------------------------------------------------------------------------------
Step 11
Getting there right? Now you need to do some tweaking to the colors of the image. This can mean anything from water, to the sky or the buildings. In my
example, I think the water is a little too blue, so I’m going to desaturate it a little.
Basically use this step for any odd bits and bobs to tweak your image to make it look more streamlined. Be creative, and more importantly, make it look tidy.
I lowered the saturation of the water a little, and added some red to the buildings.
都做到这儿了吧?现在需要对图像的颜色做一些调整。这包括海水,天空和建筑。在这个例子里,我觉得海水有点太蓝了,所以我准备降低一点它的饱和度。
基本上在处理任何杂七杂八的东西时做这一步调整,都会让你的图像看上去更加匹配。发挥想象吧,最重要的是让画面看起来更干净。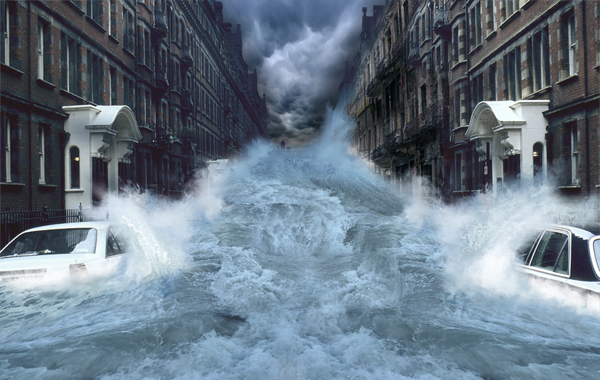
--------------------------------------------------------------------------------
Step 12
Now we’ll work on the fog. Its sounds daunting but its actually fairly simple to do. Select a blue color from your water using the Eyedropper Tool. Now
select the Gradient Tool and use the following settings.
现在该做一些雾气了。这听上去挺费劲,其实做起来非常简单。用吸管工具在海水附近选择一种蓝色。现在选择渐变工具,参数如下。
You will need to create a new layer underneath you’re “water” layer and create the gradient so it blocks out any backdrop behind the water.
Duplicate the layer (Command + J) and place it on top of your water layer, at about 30% opacity. Set this layer to Multiply.
你需要在海浪图层下新建一个图层并创建渐变,这样就能覆盖所有海水后面的背景了。
复制图层(Ctrl+J)并把它挪到海水图层的上面,不透明度大概30%,混合模式改为正片叠底。 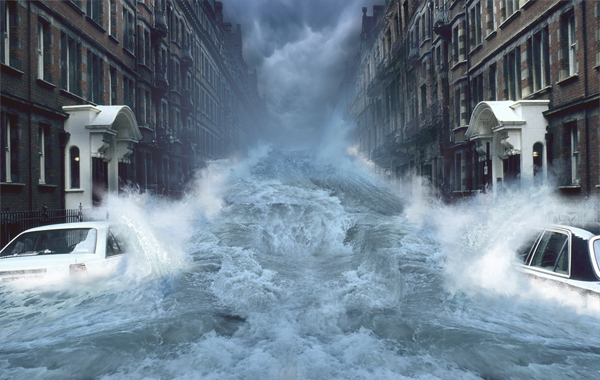
--------------------------------------------------------------------------------
Step 13
This next step is to add rain. There are lots of tutorials on the web that show how to create rain. We’ll keep it relatively simple in this tutorial though.
First, create a new layer and fill it with black. Go to Filter > Noise > Add Noise and use these settings.
现在我们该添加雨水了。网上有很多关于创建雨水的教程,我们这次用的是一个相对简单的方法。首先,新建一个图层并填满黑色。执行滤镜>杂色>添加杂色
,参数如下。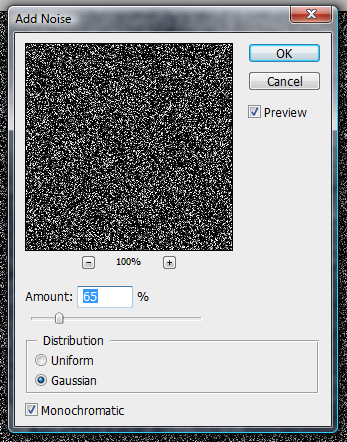
Then Filter > Blur > Motion Blur> and use these settings.
接着执行滤镜>模糊>动感模糊,参数如下。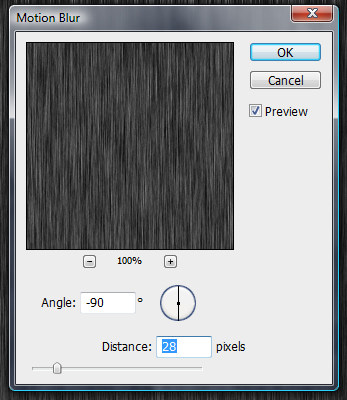
Then Image > Adjustments > Levels and use the following settings.
接着执行图像>调整>色阶,参数如下。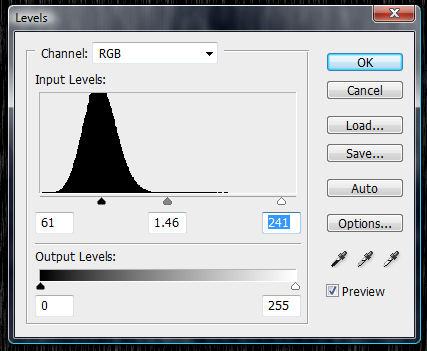
Set the Layer to Screen and use a soft eraser to erase the bottom and top of the Layer, then go to Edit > Transform > Free Transform the “rain” Layer so it
covers the whole screen.
将图层混合模式设为滤色,用软笔刷的橡皮擦除图层的底部和顶部,然后执行编辑>自由变换,将雨水图层覆盖整个画布。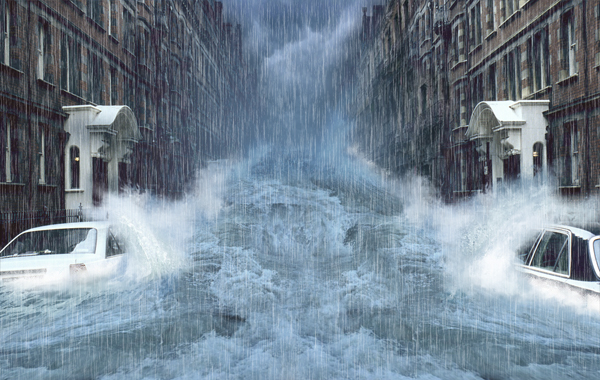
--------------------------------------------------------------------------------
Step 14
It looks a little bit empty in the middle of the water doesn’t it?
Open up the car image and place it somewhere in the distance, underneath the “fog” layer. Resize the images and erase the edges carefully and use the
splash1 image to give some life to the car.
现在图像中间的水面看上去有点空对吗?
找到一张汽车的图片添加进去,放在雾气图层下放。调整大小仔细的擦除硬边,在用之前的水花为汽车增加一些细节。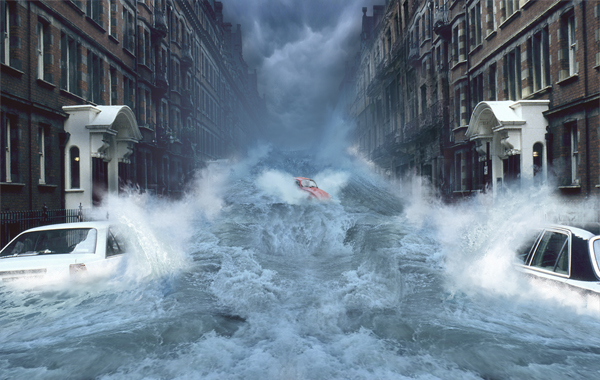
--------------------------------------------------------------------------------
Step 15
Now is the fun part. You’ll need to create a few gradient maps first. Click the Adjustment layer button located at the bottom of your layers window and
select the Gradient Map option. Then Click the little arrow in the top-right of the box and select Pastels as shown.
现在是比较有趣的部分了。首先你需要创建一些渐变贴图。点击图层面板底部的调整图层按钮,选择渐变,然后点击渐变图标右边的黑色小箭头,选择蜡笔选
项。可以参照下图。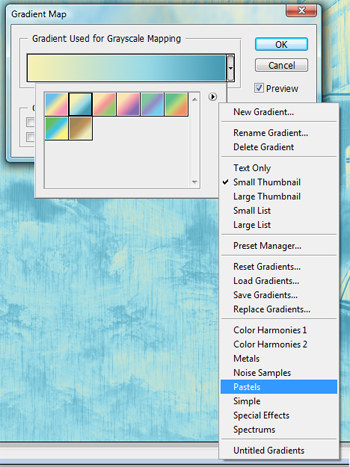
Use the following settings. Finally, set the layer to Multiply at 100%.
按住如下参数设置。最后,将图层混合模式改为正片叠底。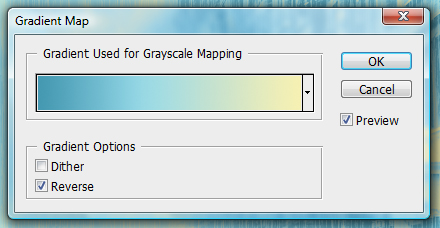
--------------------------------------------------------------------------------
Conclusion
总结
Now its just a case of adding depth and a few other adjustments. Select the Blur Tool at 20% strength, then start blurring the “backdrop” layer in the
distance and on the rooftops.
现在演示一个为图片增加深度的例子。选择模糊工具,20%强度,开始模糊“backdrop”图层远处与房顶交接的位置。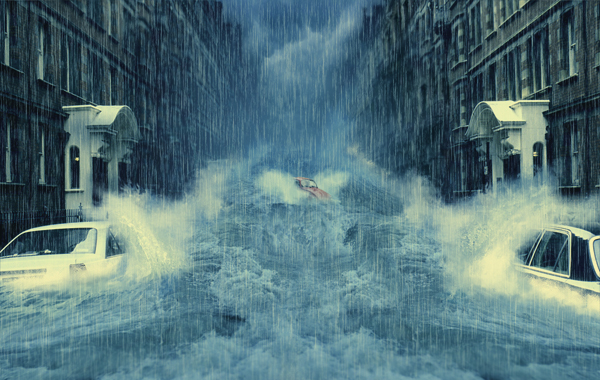
Create a new layer and go to Image > Apply Image and then go to Filter > Sharpen > Sharpen, which gives the image a more detailed and stylized feel. Now you
’re done!
新建一层执行图像>应用图像,然后执行滤镜>锐化>锐化,这会使涂片更具风格和细节。现在大功告成了!